Saturday, December 17, 2016

My own jsdoc plugin

Jsdoc provides a convenient way to document APIs by adding comments directly in the code. However, the task can be tedious when it comes to documenting every details of each symbol. Luckily, the tool provides ways to interact with the parsing process through the creation of plugins.

Introduction

Just before the release of version 0.1.5, I focused on documenting the API. I knew I had to use jsdoc so I started adding comments early in the development process.

Documentation

Before going any further with jsdoc, I would like to quickly present my point of view on documentation.

I tend to agree with Uncle Bob's view on documentation meaning that I first focus on making the code clean and, on rare occasions, I put some comments to clarify some non-obvious facts.

Code never lies, comments sometimes do.

This being said, you don't expect developers to read the code to understand which methods they have access to and how to use them. That's why, you need to document the API.

Automation and validation

To make it a part of the build process, I installed grunt-jsdoc and configured two tasks:

  • One 'private' to see all symbols (including the private and the internal ones)
  • One 'public' for the official documentation (only the public symbols)

The default rendering of jsdoc is quite boring, I decided to go with ink-docstrap for the public documentation.

To make sure my jsdoc comments are consistent and correctly used, I also configured eslint to validate them.

jsdoc offers many aliases (for instance @return and @returns). That's why eslint allows you to decide which tokens should be preferred.

Finally, I decided to control which files would be used to generate documentation through the sources.json doc properties.

The reality

After fixing all the linter errors, I quickly realized that I had to do lot of copy & paste to generate the proper documentation.

For example: when an internal method is exposed as a public API, the comment must be copied.

  • On one hand, the internal method must be flagged with @private
  • On the other hand, the public method has the same comment but flagged with @public

/** * Extends the destination object by copying own enumerable properties from the source object. * If the member already exists, it is overwritten. * * @param {Object} destination Destination object * @param {...Object} source Source objects * @return {Object} Destination object * @private */ function _gpfExtend (destination, source) { _gpfIgnore(source); [].slice.call(arguments, 1).forEach(function (nthSource) { _gpfObjectForEach(nthSource, _gpfAssign, destination); }); return destination; } /** * Extends the destination object by copying own enumerable properties from the source object. * If the member already exists, it is overwritten. * * @param {Object} destination Destination object * @param {...Object} source Source objects * @return {Object} Destination object * @public */ gpf.extend = _gpfExtend;

This implies double maintenance with the risk of forgetting to replace @private with @public.

The lazy developer in me started to get annoyed and I started to look at ways I could do things more efficiently.

In that case, we could instruct jsdoc to copy the comment from the internal method and use the name to detect if the API is public or private (depending if it starts with '_').

jsdoc plugins

That's quite paradoxical for a documentation tool to have such a short explanation on plugins.

Comments and doclets

So let's start with the basis: jsdoc relies on specific comment blocks (starting with exactly two stars) to detect documentation placeholders. It is not required for these blocks to be located near a symbol but, when they do, the symbol context is used to determine what is documented.

/** this is a valid jsdoc description for variable a */ var a; /** @file This is also a valid jsdoc description for the whole file */ /*** this comment is not a valid jsdoc one */ /* * This is not a valid jsdoc comment, even if it contains jsdoc tags * @return {Object} Empty object * @public */ function () { return {} }

Each valid jsdoc comment block is converted into a JavaScript object, named doclet, containing extracted information.

For instance, the following comment and function /** * Extends the destination object by copying own enumerable properties from the source object. * If the member already exists, it is overwritten. * * @param {Object} destination Destination object * @param {...Object} source Source objects * @return {Object} Destination object * @private */ function _gpfExtend (destination, source) { _gpfIgnore(source); [].slice.call(arguments, 1).forEach(function (nthSource) { _gpfObjectForEach(nthSource, _gpfAssign, destination); }); return destination; }

generates the following doclet { comment: '/**\n * Extends the destination object by copying own enumerable properties from the source object.\n * If the member already exists, it is overwritten.\n *\n * @param {Object} destination Destination object\n * @param {...Object} source Source objects\n * @return {Object} Destination object\n * @since 0.1.5\n */', meta: { range: [ 834, 1061 ], filename: 'extend.js', lineno: 34, path: 'J:\\Nano et Nono\\Arnaud\\dev\\GitHub\\gpf-js\\src', code: { id: 'astnode100000433', name: '_gpfExtend', type: 'FunctionDeclaration', paramnames: [Object] }, vars: { '': null } }, description: 'Extends the destination object by copying own enumerable properties from the source object.\nIf the member already exists, it is overwritten.', params: [ { type: [Object], description: 'Destination object', name: 'destination' }, { type: [Object], variable: true, description: 'Source objects', name: 'source' } ], returns: [ { type: [Object], description: 'Destination object' } ], name: '_gpfExtend', longname: '_gpfExtend', kind: 'function', scope: 'global', access: 'private' }

The structure itself is not fully documented as it depends on the tags used and the symbol context. However, some properties are most likely to be found, see the newDoclet event documentation.

I strongly recommend running jsdoc using the command line and output some traces to have a better understanding on how doclets are generated.

In the GPF-JS welcome page, I created a link named "JSDoc plugin test" for that purpose. It uses an exec:jsdoc task.

Plugins interaction

The plugins can be used to interact with jsdoc at three different levels:

  • Interact with the parsing process through event handlers (beforeParse, jsdocCommentFound, newDoclet, processingComplete...)
  • Define tags and be notified when they are encountered inside a jsdoc comment: it gives you the chance to alter the doclet that is generated
  • Interact with the parsing process through an AST node visitor

The most important thing to remember is that you can interfere with doclet generation by altering them or even preventing them. But, I struggled to find ways to generate them on the fly (i.e. without any jsdoc block comment).

It looks like there is a way to generate new doclets with a node visitor. However, the documentation is not very clear on that part. See this example.

gpf.js plugin

Most of the following mechanisms are triggered during the processingComplete event so that all doclets are already generated and available.

Member types

When creating a class, I usually declare members and initialize them with a default value that is representative of the expected member type. This works well with primitive types or arrays but it gets more complicated when dealing with object references (which are most of the time initialized with null).

For instance, in error.js:

_gpfExtend(_GpfError.prototype, /** @lends gpf.Error.prototype */ { constructor: _GpfError, /** * Error code * * @readonly * @since 0.1.5 */ code: 0,

In that case, the member type can easily be deduced from the AST node:

{ comment: '/**\n * Error code\n *\n * @readonly\n * @since 0.1.5\n */', meta: { range: [ 801, 808 ], filename: 'error.js', lineno: 35, path: 'J:\\Nano et Nono\\Arnaud\\dev\\GitHub\\gpf-js\\src', code: { id: 'astnode100000209', name: 'code', type: 'Literal', value: 0 } }, description: 'Error code', readonly: true, since: '0.1.5', name: 'code', longname: 'gpf.Error#code', kind: 'member', memberof: 'gpf.Error', scope: 'instance' }

Indeed the AST structure provides the literal value the member is initialized with (see meta.code.value).

This is done in the _addMemberType function.

Access type based on naming convention

There are no real private members in JavaScript. There are ways to achieve similar behavior (such as function scoped variables used in closure methods) but this is not the discussion here.

The main idea is to detail, through the documentation, which members the developer can rely on (public or protected when inherited) and which ones should not be used directly (because they are private).

Because of the way JavaScript is designed, everything is public by default. But I follow the naming convention where the underscore at the beginning of the member name means that the member is private.

As a consequence, the symbol name gives information about its access type.

This is leveraged in the _checkAccess function.

Access type based on class definitions

In the next version, I will implement a class definition method and the structure will provide information about members visibility. This will include a way to define static members.

The idea will be to leverage the node visitor to keep track of which visibility is defined on top of members.

Custom tags

Through custom tags, I am able to instruct the plugin to modify the generated doclets in specific ways. I decided to prefix all custom tags with "gpf:" to easily identify them, a dictionary defines all the existing names and their associated handlers. It is leveraged in the _handleCustomTags function.

@gpf:chainable

When a method is designed to return the current instance so that you can easily chain calls, the tag @gpf:chainable is used. It instructs jsdoc that the return type is the current class and the description is normalized to "Self reference to allow chaining".

It is implemented here.

@gpf:read / @gpf:write

Followed by a member name, it provides pre-defined signatures for getters and setters. Note that the member doclet must be defined when the tag is executed.

They are implemented here.

@gpf:sameas

This basically solves the problem I mentioned at the beginning of the article by copying another symbol documentation, provided the doclet exists.

It is implemented here.

The enumeration case

The library uses an enumeration to describe the host type. The advantage of an enumeration is the encapsulation of the value that is used internally. Sadly, jsdoc reveals this value as the 'default value' in the generated documentation.

Hence, I decided to remove it.

This is done here, based on this condition.

Actually, the type is also listed but the enumeration itself is a type... It will be removed.

Error generation in GPF-JS

That's probably the best example to demonstrate that laziness can become a virtue.

In the library, error management is handled through specific exceptions. Each error is associated to a specific class which comes with an error code and a message. The message can be built with substitution placeholders. The gpf.Error class offers shortcut methods to create and throw errors in one call.

For instance, the AssertionFailed error is thrown with: gpf.Error.assertionFailed({ message: message });

The test case shows the exception details: var exceptionCaught; try { gpf.Error.assertionFailed({ message: "Test" }); } catch (e) { exceptionCaught = e; } assert(exceptionCaught instanceof gpf.Error.AssertionFailed); assert(exceptionCaught.code === gpf.Error.CODE_ASSERTIONFAILED); assert(exceptionCaught.code === gpf.Error.assertionFailed.CODE); assert(exceptionCaught.name === "assertionFailed"); assert(exceptionCaught.message === "Assertion failed: Test");

Errors generation

You might wonder how the AssertionFailed class is declared?

Actually, this is almost done in two lines of code: _gpfErrorDeclare("error", { /* ... */ /** * ### Summary * * An assertion failed * * ### Description * * This error is triggered when an assertion fails * * @see {@link gpf.assert} * @see {@link gpf.asserts} * @since 0.1.5 */ assertionFailed: "Assertion failed: {message}",

The _gpfErrorDeclare internal method is capable of creating the exception class (its properties and throwing helper) using only an exception name and a description. It extensively uses code generation technics.

Documentation generation

As you might notice, the jsdoc block comment preceding the assertionFailed declaration does not contain any class or function documentation. Indeed, this comment is reused by the plugin to generate new comments.

Actually, this is done in two steps:

Creating new documentation blocks during the beforeParse

Hooking the beforeParse event, the plugin will search for any use of the _gpfErrorDeclare method.

A regular expression captures the function and extract the two parameters. Then, a second one extracts each name, message and description to generate new jsdoc comments.

Blocking the default handling through the node visitor

By default, the initial jsdoc block comment will document a temporary object member. Now that the proper comments have been injected through the beforeParse event, a node visitor prevents any doclet to be generated inside the _gpfErrorDeclare method.

This is implemented here.

Actually, I could have removed the comment block during the beforeParse event but the lines numbering would have been altered.

ESLint customization

Adding new function signature tags through the jsdoc plugin helps me to reduce the amount of comments required to document the code. As mentioned at the beginning of the article, I configured eslint to validate any jsdoc comment.

However, because the linter is not aware of the plugin, it started to tell me that my jsdoc comments were invalid.

So I duplicated and customized the valid-jsdoc.js rule to make it aware of those new tags.

@since

Knowing in which version an API is introduced may be helpful. The is the purpose of the tag @since. However, manually setting it can be boring (and you might forget some comments).

Here again, this was automated.

Conclusion

Bill Gates quote
Bill Gates quote

Obviously, there is an upfront investment to automate everything but, now, the lazy developer in me is satisfied.

Saturday, December 10, 2016

Release 0.1.5

This new release delivers clean foundation to build the library in a proper (and faster?) way. In this article, I will detail all the tooling that were built and what is the road map for the next releases.

It's finally out !

Almost two years ago, I was experimenting NPM publication and the version 0.1.4 went out.

At that time, I had no clear road map or even a vision of what I wanted to do with the GPF-JS library. Long story short, I was trying to consolidate my JavaScript know-how in order to re-create (in a better way) a library that I started in a previous company.

If you check the package.json history, version 0.1.5 'officially' started on November 26th, 2015. This was after I added some grunt packages to automate linting (jshint and ESlint) as well as testing (mocha 1, 2 and istanbul 1, 2).

Clearly, the goal shifted from coding to automating, testing and checking quality. And that probably explains why I needed a full year to achieve this version.

What's inside?

Well... that's embarrassing but... almost nothing. Indeed, if you check the documentation, only few functions and one class are available for now.

That's suspicious
That's suspicious

At least, the library provides a compatibility layer for all supported environments.

But, still, you might wonder: what did I spend my year on?

To put it in a nutshell, I focused more on the how than on the what.

From Grunt command line to Web interface

Grunt has been implemented to automate lots of tasks.

When I use grunt --help, the following commands are listed: concurrent Run grunt tasks concurrently * connect Start a connect web server. * copy Copy files. * jshint Validate files with JSHint. * uglify Minify files with UglifyJS. * watch Run predefined tasks whenever watched files change. eslint Validate files with ESLint * exec Execute shell commands. * htmllint HTML5 linter and validator. * instrument instruments a file or a directory tree reloadTasks override instrumented tasks storeCoverage store coverage from global makeReport make coverage report coverage check coverage thresholds * jsdoc Generates source documentation using jsdoc * mocha Run Mocha unit tests in a headless PhantomJS instance. * mochaTest Run node unit tests with Mocha * notify Show an arbitrary notification whenever you need. * notify_hooks Config the automatic notification hooks. chrome Alias for "connectIf", "exec:testChromeVerbose" tasks. firefox Alias for "connectIf", "exec:testFirefoxVerbose" tasks. ie Alias for "connectIf", "exec:testIeVerbose" tasks. check Alias for "exec:globals", "concurrent:linters", "concurrent:quality", "exec:metrics" tasks. connectIf Run connect if not detected default Alias for "serve" task. fixInstrument Custom task. istanbul Alias for "instrument", "fixInstrument", "copy:sourcesJson", "mochaTest:coverage", "storeCoverage", "makeReport", "coverage" tasks. make Alias for "exec:version", "check", "jsdoc:public", "connectIf", "concurrent:source", "exec:buildDebug", "exec:buildRelease", "uglify:buildRelease", "exec:fixUglify", "concurrent:debug", "concurrent:release", "uglify:buildTests", "copy:publishVersionPlato", "copy:publishVersion", "copy:publishVersionDoc", "copy:publishTest" tasks. plato Alias for "copy:getPlatoHistory", "exec:plato" tasks. node Custom task. phantom Custom task. rhino Custom task. wscript Custom task. pre-serve Custom task. serve Alias for "pre-serve", "connect:server", "watch" tasks.

The exec task also has 27 sub configurations...

As I am too lazy to remember (or even type) all the grunt tasks, I decided to create a small web interface that would offer me all the commands I need in one click.

When you install the project and run grunt (see readme), a browser will pop to display this page:

Welcome page
Welcome page

It will be empty at first but this will be improved.

The magic happens when you click the buttons or links. They are simple hyperlinks to URL like:

http://localhost:8000/grunt/make

This one triggers the grunt task named make.

While being executed in the background, any output generated by the task is parsed for formatting and sent back to the browser. As a result, you can trace the task execution in real time:

grunt make
grunt make

From an implementation point of view, I added a middleware to the connect task.

This is not the code I am the most proud of... but it works. I am planning to improve this code as soon as the library will offer decent parsing helpers.

Source management

I briefly explained my issues with source management and the reason why I needed a template mechanism. After implementing my own template engine, I created a page that allows me to quickly enable / disable sources and reorganize them (using drag & drop).

The tile titled "Sources" shows the number of active source compared to the total number of sources. If you click it, you access the list.

Sources preview
Sources preview

In front of each source, you have access to:

  • Dependencies analysis: the red bubble shows the count of sources the current one depends on and the green bubble shows the count of sources depending on this one. Each bubble details the dependencies inside a tooltip
  • Load checkbox: the source will be part of the library when ticked
  • Test checkbox: it appears only if a matching test file exists and it configures if it is included in the test suite
  • Doc checkbox: jsdoc integration appeared very late, I wanted to be able to control which files the documentation is extracted from
  • Description: this is directly extracted from the source by searching the @file comment

As of today, only 28 are part of the library for a total of 100 existing sources. Indeed, because quality is measured, I was looking for an easy way to exclude files without physically remove them from the project.

All these files accesses are implemented through another middleware to the connect task. It implements basic CRUD methods on the file system.

Well, Delete is not yet enabled because I didn't need it.

You might also have valid concerns about security as this middleware not only allows reads but also updates. I will add an extra path checking algorithm to make sure that only project files are available. As they are backed up by git, those files can be easily restored if anything goes wrong.

As the complexity of the sources.json file constantly grows, this tool rapidly demonstrated value. I recently had to re-organize the order, this was done in a blink!

Testing

I am constantly advocating for Test Driven Development. As a consequence, there was no way I could release this version without the necessary tooling to achieve it.

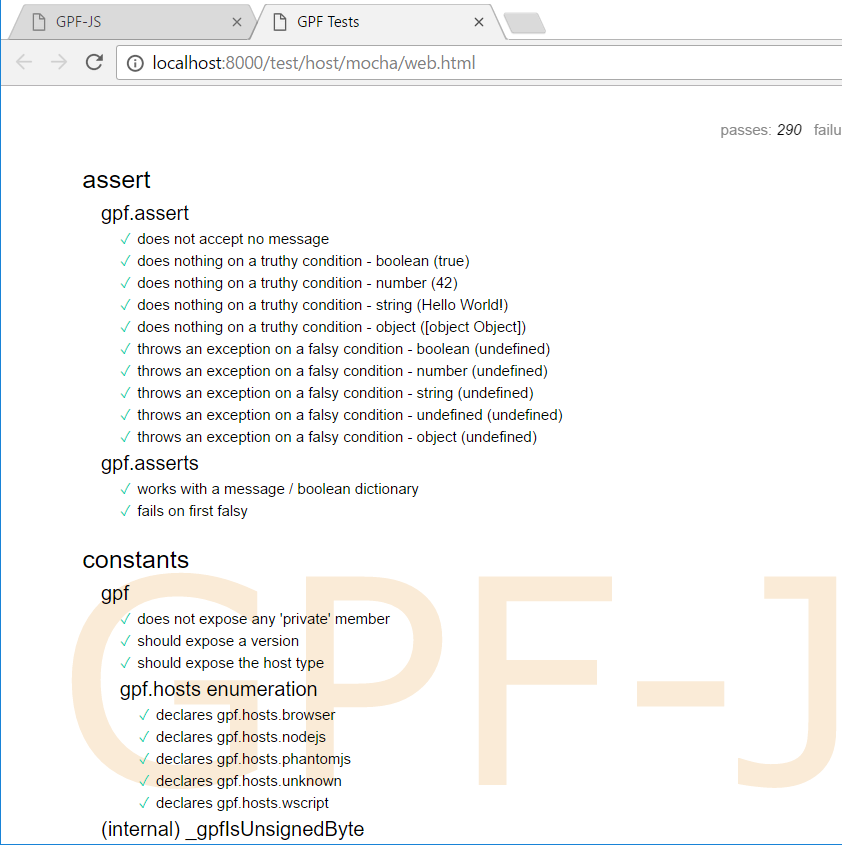
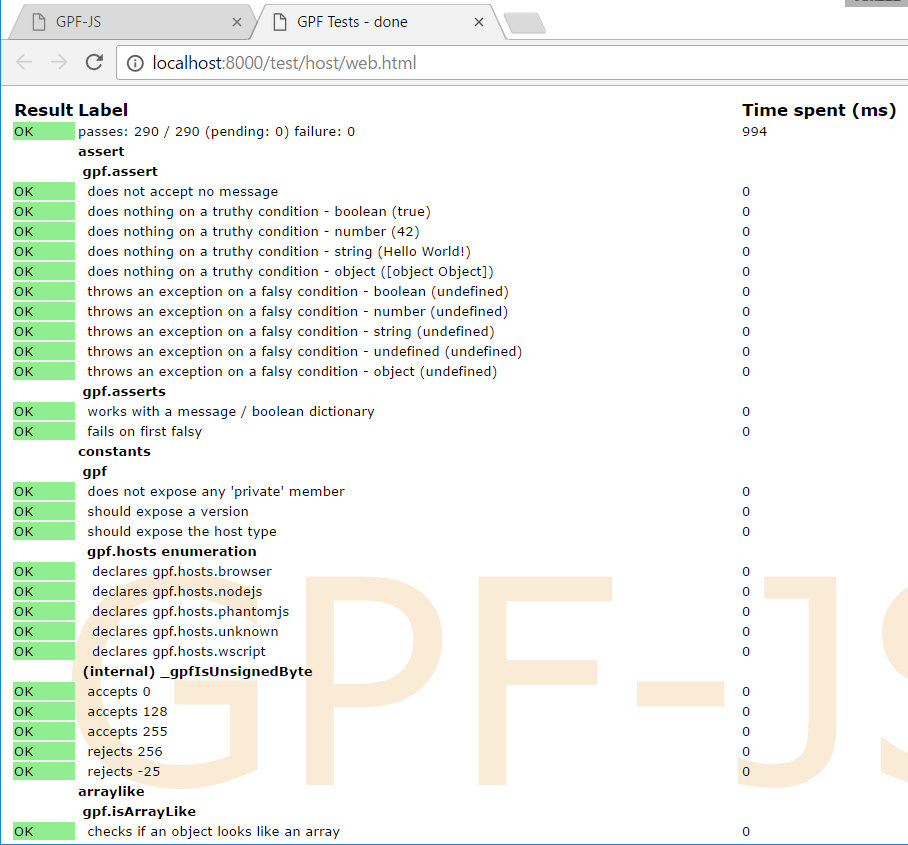
All the available environment can be tested, this is why the tile named "Environments" was created. But I usually go with mocha & my bdd implementation inside the browser. So I created a second tile named "Tests".

Mocha in a browser
Mocha in a browser
BDD in a browser
BDD in a browser

Selenium

Manual testing in a browser is one thing but it is even better when it is fully automated.

So I implemented Selenium to manipulate browsers and I wrote an explanation to configure it.

I had to create three helper files to deal with selenium drivers:

  • detectSelenium.js: which is going over the list of possible drivers (see selenium.json) and try to instantiate each of them. As a result, a file is generated in the tmp folder and it determines what can be used on the current host (grunt tasks will be dynamically generated from this file).
  • Once the selenium tests are made browser-agnostic, the selenium.js program executes the tests and waits for the result.

This can be triggered through grunt tasks and it has been integrated in the build process (so that it fails if anything goes wrong).

Backward compatibility

Each release comes with several files:

  • gpf.js: the minified library (see below to see how this version is built), version 0.1.5
  • gpf-debug.js: the concatenated library (with comments), version 0.1.5
  • test.js: the minified concatenation of all test files, version 0.1.5

As it is important to ensure the backward compatibility of the API, I have some plans to keep track of all release tests files in order to check them constantly.

Developing tests

I would have some funny stories to tell about test development...

But this will be a long article so I will only give some advices learned the hard way:

  • Tests are a critical part of the project. The test code must be clean and easily maintainable. When something is broken after a modification, you will be happy if you can quickly identify the reason from the tests.
  • Asynchronous testing is complex, never take any assumption on the performance of the host running your tests. When I developed the timeout ones, I had some hard times understanding that the timer resolution does not allow me to consider intervals that are smaller than 10ms. Also, I had to make sure that concurrent timeouts are triggered simultaneously.
  • Testing the internal logic of the library might be necessary: the public API rely on internal helpers. This is also true when the library supports different platforms but only one is used for code coverage (NodeJS in my case). I decided to expose those internals when using the source version. A good example is the compatibility layer: NodeJS and most browsers support all the modern API but Rhino or cscript don't. Hence, I had to develop tests that are capable of checking both version (native and polyfill).

Code coverage

I decided to go with istanbul for code coverage. I also evaluated Blanket.JS (see my training on JavaScript functions using stubs) but the first one offers more flexibility.

The code coverage is evaluated by running the tests on the source version (see build process). Some threshold values are defined to determine if the files satisfy the expectations regarding the minimum coverage. If not, the build process fails.

Ignoring untested path

There are almost 41 use of istanbul ignore in the sources. For instance, the host detection algorithm inside boot.js can't be fully covered because NodeJS goes only through one branch.

Each comment must be followed by an explanation of its purpose. I wrote a documentation on this topic.

To be fully transparent, I detail the coverage inside the readme file.

Fixing instrumentation

Most of the time, code coverage rely on source instrumentation: this step is required to add instructions in the source code and keep track of what has been executed.

Blanket.JS does it on the fly

For istanbul, a container variable is declared at the beginning of each modified source and this variable is referenced everywhere.

"use strict"; var __cov_wAQFT3LPP9UQX7F5lrKtpA = (Function('return this'))(); if (!__cov_wAQFT3LPP9UQX7F5lrKtpA.__coverage__) { __cov_wAQFT3LPP9UQX7F5lrKtpA.__coverage__ = {}; } __cov_wAQFT3LPP9UQX7F5lrKtpA = __cov_wAQFT3LPP9UQX7F5lrKtpA.__coverage__; /* ... */ __cov_wAQFT3LPP9UQX7F5lrKtpA.s['1']++; _gpfExtend(gpf, { clone: function (obj) { __cov_wAQFT3LPP9UQX7F5lrKtpA.f['1']++; __cov_wAQFT3LPP9UQX7F5lrKtpA.s['2']++; return JSON.parse(JSON.stringify(obj)); } });

If you have read the other articles (in particular the template mechanism one), you know that I like doing code generation. Sometimes, I rely on a function that is converted to string, altered and converted back to a function.

One annoying consequence of this method is that the newly created function can't use any variable declared outside of its scope. There are some workarounds such as passing those variables to a function factory. One good example is the polyfill for bind.

However, things get more complicated when you don't know that the created function requires variables because it was modified by code coverage instrumentation... This one gave me some headaches...

Need a new savior?
Need a new savior?

Once I understood the issue, the solution became obvious: I had to make sure that those container remain available even if the function is dynamically created. I modified the task to add them to the NodeJS global dictionary.

Quality with Plato

Plato is probably the tool that really changed the way I develop the library. I use it to measure the quality of the project.

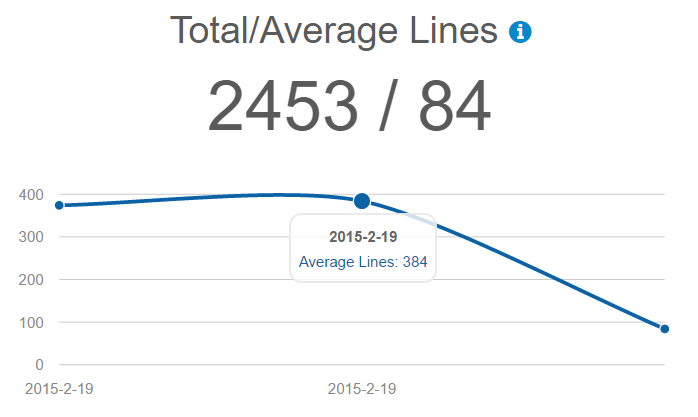
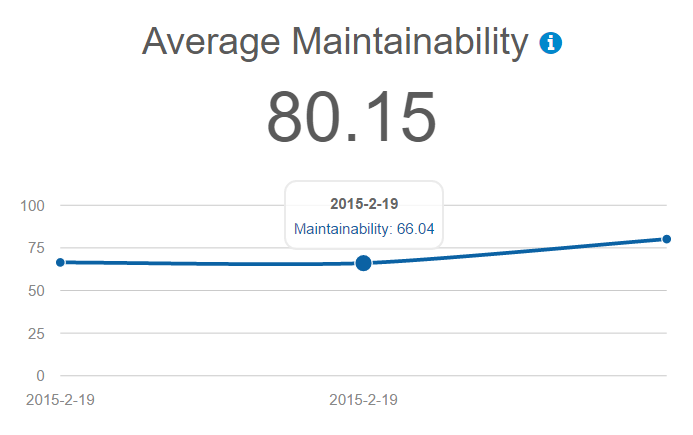
Below you can see the evolution of the main criteria.

Total/Average Lines
Total/Average Lines

Average maintainability

Note that the measure taken by the 19th of February was done on all the files. Now it is done only with the files included in the library.

On top of global metrics, a report is generated for each file, showing which functions are the most complex. This gives you valuable hint on where you should put your efforts to make the file more maintainable.

You can check the version 0.1.5 analysis.

Again, I defined a minimum maintainability value which fails the build process if one source does not respect it.

Documentation

A good library is a documented one. Writing documentation and making sure it is up-to-date is a painful process and the more you can automate, the better it is. Luckily we, JavaScript developers, can use jsdoc to extract relevant information from the sources.

Documentation for version 0.1.5 can be accessed here.

Improved automation

Did I mention I am lazy? I also hate repeating myself and I do follow the DRY principle.

That's why I created my own jsdoc plugin to avoid repetition and automate obvious information such as:

  • Private accessibility when the function / member name starts with an underscore
  • Member types from their default value
  • Custom tags

This plugin also allowed me to generate extensive documentation on errors based on the _gpfErrorDeclare instruction.

An article will come soon...

Development process

Following TDD, I develop the tests first. Then, I start the implementation until the test succeeds.

To help me in that task, I modified the grunt tasks watch and serve to monitor the src folder.

Every modified file triggers the linters and plato. Soon, it will also trigger the right test.

In the mean time, I just refresh my test page in the browser.

Build process

The library offers three flavors:

  • debug version: this version is generated from the sources. It is built almost by concatenating the files after small transformations. A first step of preprocessing deals with special comments like /*#ifdef(DEBUG)*/. Then a step of AST transformation done with esprima is used to inject the sources inside the Universal Module Definition. The resulting AST is converted back to JavaScript using escodegen. The whole processed is configured with a file.
  • release version: it uses almost the same process than the debug version but with a different configuration file. Then a step of minification is triggered.

I have some ideas for performance optimization by manipulating the AST structure but this will come later.

Google closure compiler

Initially, I was using the Google closure compiler to minify the release version. However, this tool takes too much liberty on the initial code (such as changing the functions' signature) and I ended up choosing another tool.

UglifyJS and wscript

Now I am using UglifyJS2 to generate the final release version. I opened an issue because the code is not compatible with cscript but I ended up developing my own fix.

Time management

I often got the same question: "how do you find the time to work on this project?"

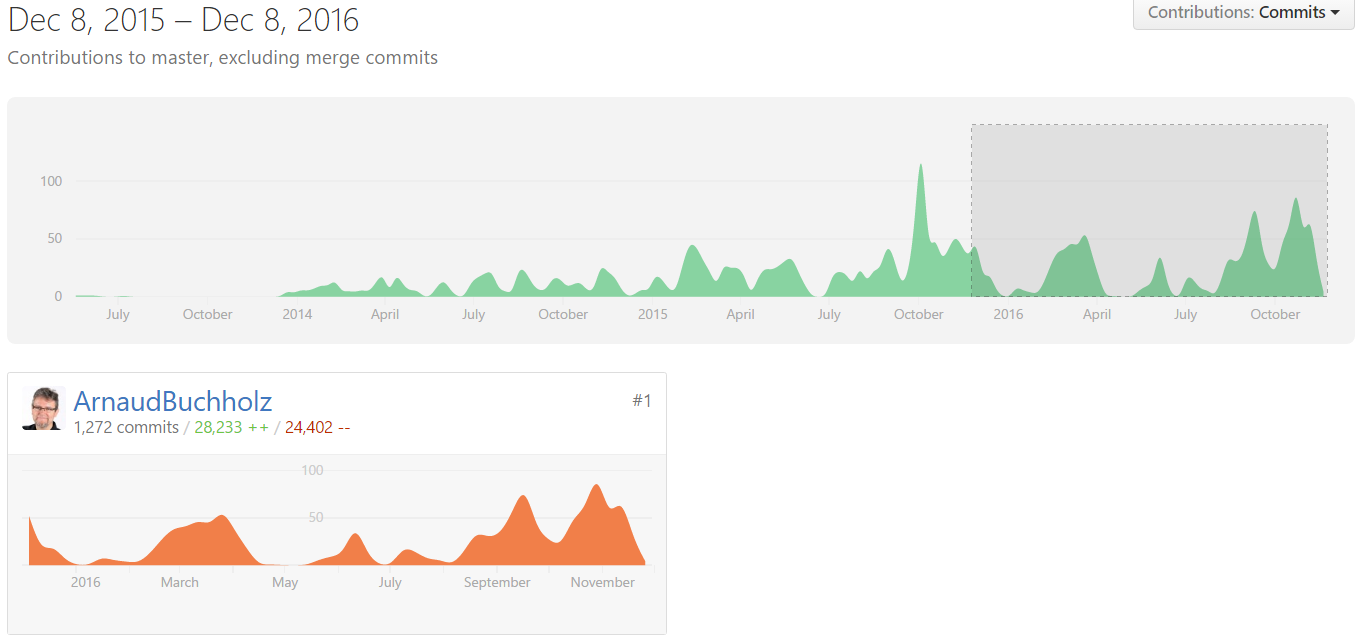
GitHub provides lots of statistics regarding how much I worked over the last years...

2013
2013
2014
2014
2015
2015
2016
2016

I force myself to push at least one file or issue every day but, in the end, I don't spend lot of time. Over the years, I found the proper balance between my personal life, my job and my projects.

Yeah !
Yeah !

I take care of pushing each little change individually. I estimate that each change requires a maximum of 5 minutes. Over the last year, because this is not the only project I worked on, I probably spend over 250 days on the library.

Last year contributions

So it means I almost did 5 pushes by day which represents an average 25 minutes of work every day (but the graph shows that it is far from linear).

I guess the secret is "interruptibility": the ability to pause what you are doing and resume it later without losing the focus.

What's next

I started to plan the releases more carefully: I write stories and I document the bugs. I also maintain a backlog.

The next versions will focus on putting back existing code into the library, this includes:

  • classes
  • interfaces
  • attributes
  • parsing helpers

In a near future, I would like to provide sample codes in the documentation: ideally, this would be based on the tests.

More cool stuff will come soon so stay tuned!